Operation
- Your Mathmos product will operate best after it has been used four or five times. For the first few times you may see small air bubbles in the lava. Please note the heating time will decrease after several uses.
- Please do not leave the product on for more than six hours a day or allow it to overheat; this will prolong the life of your product. Overheating will shorten the life of the product; if it is overheating there will be either only one large bubble at the top of the bottle or a lot of very small bubbles.
- Never move or shake the product when it is in use or still warm, as this causes irreparable clouding.
Replacement
When your product has ended its life it will begin to go cloudy, the colours may fade and it will not move as well as it once did. This will happen after approximately 2000 hours in operation. Whether your product has ended its life or when you wish to have an alternative colour combination, visit our website at www.mathmos.com for more information on a replacement bottle or full product. Please note we do not refill bottles. Please on no account open the secure cap and add liquids.
If the bulb blows, please replace it with one of the same type and wattage. Only fit the correct bulb, as stated in the label in the base. Visit our website at www.mathmos.com for more information on replacement bulbs.
IMPORTANT! Always allow your product to cool down completely prior to handling or moving the product.
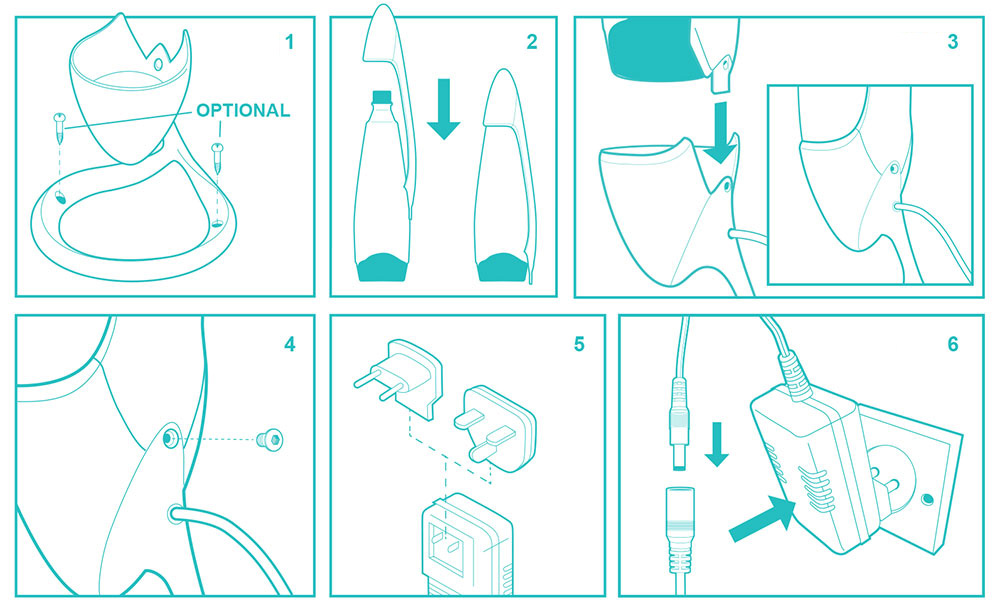
Once your product has completely cooled, using the allen key provided to unscrew and remove the back screw out (keep these components safe). Carefully, holding both the bottle and arm piece, lift and remove the bottle and arm piece from the base. Carefully take the arm piece off the bottle and place it onto the bottle you would like to use. Now refer to ‘set up’ for instructions on how to assemble.
Safety Instructions
- This product carries the statutory guarantee of the country of purchase and meets all the applicable standards requirements.Use this product only for its intended use as described in these instructions. Do not use attachments not recommended by the manufacturer.
- Do not use any other means to heat up the bottle other than the bulb provided nor attempt to cool it down artificially.
- Do not operate the product for more than 6 hours a day.
- The liquids in the product are not dangerous and can be disposed of normally (for details, see our online FAQ’s at www.mathmos.com). If the liquid is swallowed by mistake, drink plenty of water. If any symptoms appear, please visit a doctor.
- Never use this product if the bottle has been dropped as this will create weakness; obtain a replacement bottle and dispose of the old one. If the contents are spilt, please dispose of as much liquid and lava as you can remove, then use recommended cleaning methods for removing coloured water and wax for whatever floor you have.
To reduce the risk of burns, electric shock, or injury to persons:
- Unplug from outlet before putting on or taking off parts or before cleaning.
- Never operate this product if it has a damaged cord or plug, if it is not working properly, if it has been dropped or damaged, or if it has been submerged in water.
- The external flexible cable of this product cannot be replaced. If the cable is damaged, the product shall be discarded.
- To disconnect, turn the switch to the off position, then remove plug from outlet.
- Never touch the bulb if the product is switched on or if it has just been switched off in order to avoid burning. To replace a defective bulb, unplug the product and let it cool down sufficiently.
The product manufacturer cannot be made liable for damage or injury caused by improper handling, installation or use of its products.